

How To Install Windows 10 On New Build Pc
On superlative of being unnecessarily confusing, the new system requirements appear for Windows 11 by Microsoft might create a cluster of underlying bug for people looking to skip the line and upgrade to Microsoft's new operating organization.
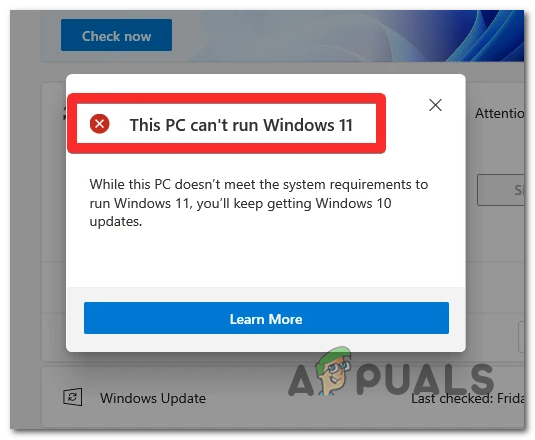
If you've tried installing the Insider Preview of Windows 11 or yous tried to use tools like PC Wellness Checker and yous were greeted by the 'This PC can't run Windows 11' error bulletin, don't despair.
There are quite a few potential workarounds that volition let you to install Windows 11 on hardware that is deemed incompatible with the new operating system from Microsoft.
Here are only a few of the potential workarounds that community members accept confirmed to be constructive in allowing you to install Windows eleven on an unsupporting PC:
- Featherbed the TPM 2.0 and Secure Boot Requirements
- Perform an In-Place Upgrade
- Utilise the WinPass11 Guided Installer
- Use a Registry Edit hack
- Utilise PowerISO to Catechumen the WIM to ESD
Note: Go on in mind that these workarounds are prone to become ineffective equally Microsoft releases new builds and patches the current exploits that the community has discovered. If any of the methods below are not working whatsoever longer, please let u.s. know in the comment section below.
Perform an In-Place Upgrade
If yous're trying to upgrade an old figurer to Windows eleven and the PC Wellness check deems that your PC is not capable of supporting the new OS, you might exist able to install it on the old hardware by forcing an in-place upgrade.
NOTE: As a lot of users have reported, if your Windows 10 PC is running the latest build bachelor, some security checks (related to secure boot and TPM 2.0) will be bypassed while performing an in-place upgrade procedure.
If you're looking for specific instructions on how to perform an In-Place upgrade from Windows 10 to Windows 11, follow the instructions beneath:
- First things starting time, it's very important to disable or uninstall any 3rd party AV or security program that you accept installed on Windows ten. Some of these are notoriously known for interfering with the upgrade to Windows 11.
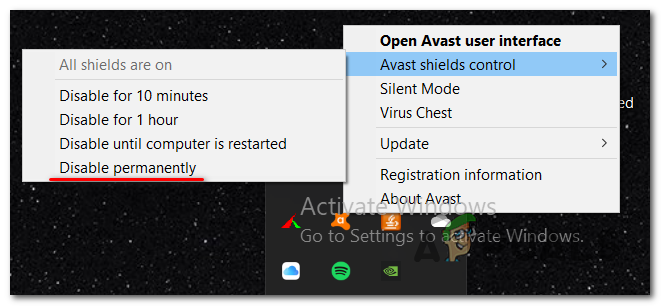
Disable antivirus Note: Y'all tin can enable them again once the in-place upgrade process is complete.
- Next, temporarily disconnect all not-OS difficult drives (external and internal) until the upgrade to Windows 11 is finished. This will prevent Windows Setup from installing OS files on other hard drives by mistake.
- Download the most recent version of the Windows xi ISO file from UUP Dump and await for the download to complete.
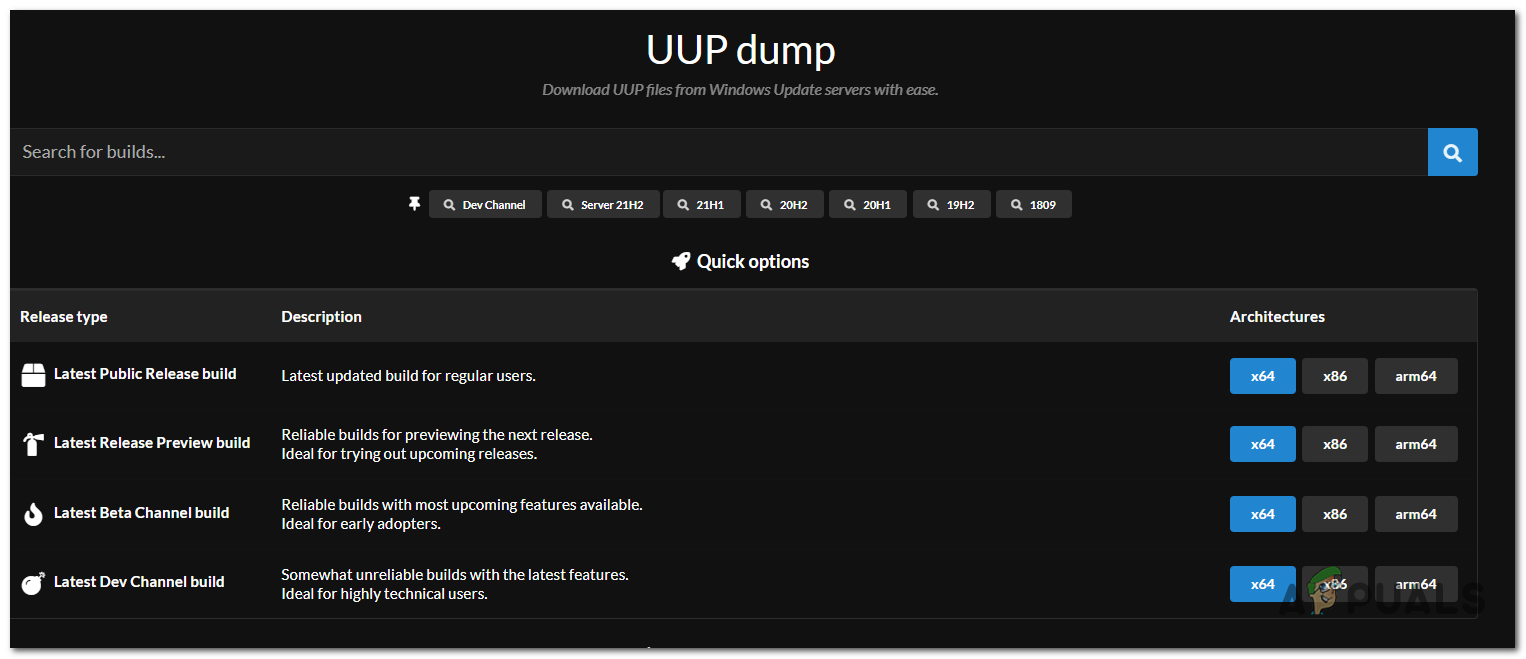
Downloading the latest version of Windows 11 from UUP Dump - One time the download is complete, simply double-click on the ISO file and wait until Windows 10 mounts it on your computer.
- Access the ISO file, double-click on setup.exe and click Yes when prompted by the UAC (User Account Control).
- After you do this, the Windows eleven Setup will have over and start preparing the installation.
- Yous won't need to do annihilation else until you lot get to the Change how Setup downloads updates screen. When you run across it, click on Change how Setup downloads updates, then uncheck the box associated with I want to aid make the installation better.
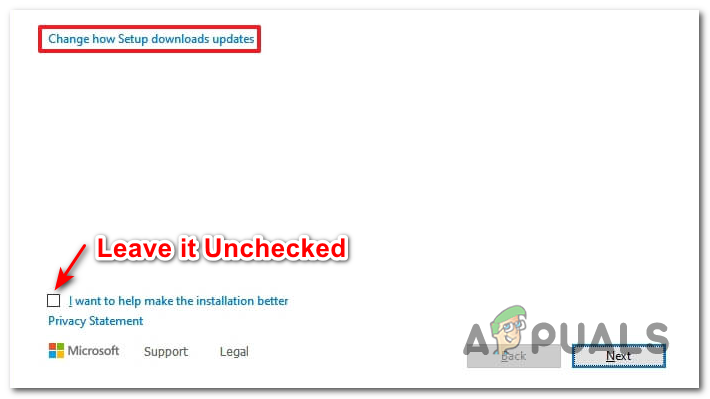
Leave it Unchecked Notation:According to some users, this is the setting that prevents Windows Setup from checking if your PC is compliant with secure boot and TPM 2.0.
- Next, follow the remaining prompts and select Not right at present when you get to theGet updates, drivers and optional featuresscreen before clicking Next.
- Wait until the remaining scans are consummate, then accept the EULA and click the Install button to offset the in-place upgrade operation.
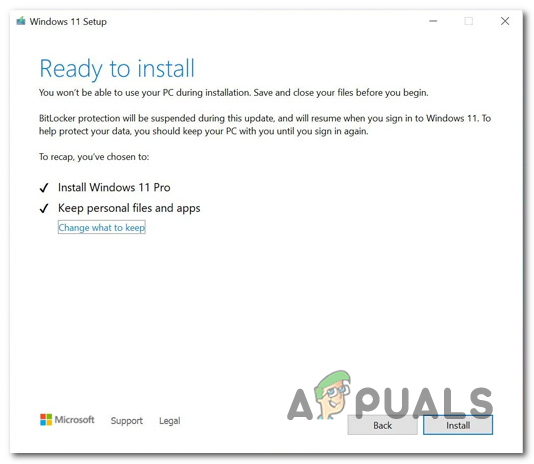
Last step to upgrading to Windows 11 Note: This is the concluding Windows 11 Setup screen when you tin safely cancel the upgrade.
- Side by side, you'll be asked to determine either yous desire to Keep personal files and apps (default), Go along personal files just or keep Nothing.
- Look until the upgrade to Windows 11 is finished, then complete the sign-in process and you're done.
Use the Windows11Upgrade Tool from GitHub
Nosotros can use a tool named "Windows11Upgrade". It can simply bypass Microsoft's new requirements including TPM, and CPU Requirements besides. It also allows yous to perform an in-identify upgrade as well as a clean install option. Here is how you tin utilise this tool to remove restrictions placed by Microsoft:-
- Kickoff of all, Head over to this official GitHub and download the latest release (here).

Downloading Windows11Upgrade tool from GitHub - In one case the tool is downloaded information technology should be in cipher format. You tin can hands open cipher files using this commodity.
- After extracting the program, run information technology as an ambassador.

Opening the tool every bit an administrator - Information technology should requite you two options "Select Windows 11 ISO File" and "Download Windows eleven ISO file".
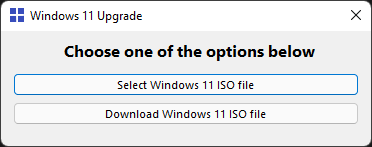
Select an option - If you already have the ISO file you can get ahead and simply click on "Select Windows 11 ISO File".
Annotation:If you don't accept a Windows eleven ISO file you tin simply click on the "Download" option. Simply make sure to select the aforementioned language if you lot are going to perform an in-place upgrade otherwise it won't work.
- Locate the ISO file and select information technology.
- Now it should give you options to "Upgrade", "Data Only", and "Clean Install".
- Select the option you would similar to perform and simply click on "Install Arrangement".

Performing an In-identify upgrade - And so you can easily follow the on-screen instructions to Install Windows 11 on your figurer.
Use a Registry Edit Hack
If you lot don't mind doing some registry adjustments in order to avoid using WinPass11 Guided Installer equally presented above, you tin also opt to build the Secure Kicking and TPM ii.0 bypassing mechanisms yourself via Registry Editor.
If TPM two.0 is not supported on your hardware and your CPU is not able to virtualize the technology via PTT or TPM, you should be able to featherbed the compatibility cheque by making the post-obit changes:
- Press Windows key + R to open a Run dialog box. Next, blazon 'regedit' inside the text box and press Ctrl + Shift + Enter to open up an elevated Registry Editor window.
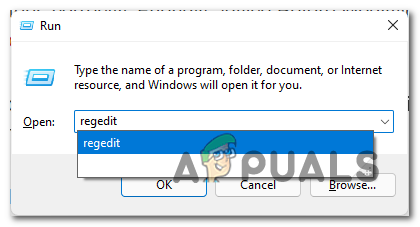
Opening Regedit Note: When you run across the UAC (User Account Control), click Yeah to grant admin admission.
- Once you're inside the Registry Editor, navigate to the following location using the left-paw side menu:
HKEY_LOCAL_MACHINE\Organisation\Setup
- Once you go far at the right location, right-click on Setup and cull New > Primal.
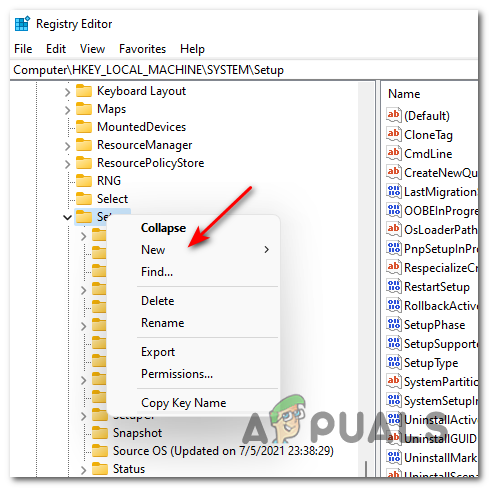
Creating a new Key - Proper noun the newly created primal LabConfig and press Enter.
- Side by side, right-click on the newly created LabConfig key and choose New > Dword (32-fleck) Value.
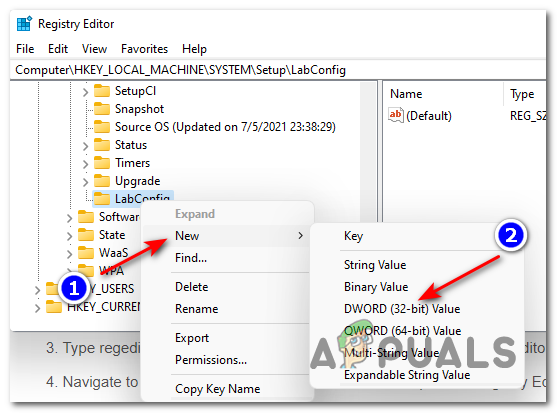
Creating a new Dword key - Name the newly created central BypassTPMCheck.
- Next, double-click on it and set the base to Hexadecimal and the Value to 1.
Note: By enforcing this value, you have successfully disabled TPM Check. - Now to disable Secure Boot cheque, correct-click on LabConfig once again and choose New > Dword (32-Bit) Value.
Creating a new Dword key - Proper noun the newly created DWord value to BypassSecureBootCheck and ready its base of operations to Hexadecimal and its Value to 1.
- To disable the RAM bank check, right-click on the LabConfig key once once more and select New > Dword (32-bit) Value.
- Next, name the newly created value as BypassRAMCheck and set its base of operations to Hexadecimal and information technology's value to 1.
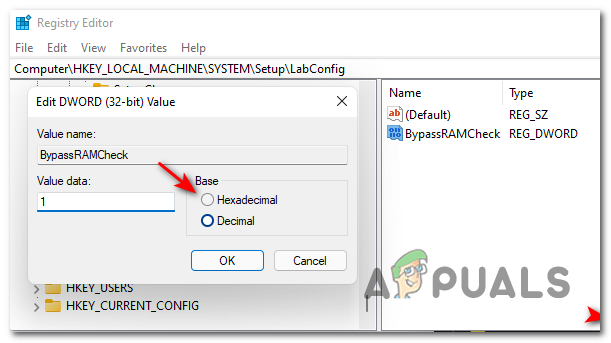
Bypassing the RAM check for Windows 11 - To disable the CPU check you can only head over to this new location:-
HKLM\Organisation\Setup\MoSetup
- Adjacent, create a new DWord value and name it "AllowUpgradesWithUnsupportedTPMOrCPU"Set it's value to 1.
- Once yous go to this point, every potential check that might stop the installation of Windows eleven in its tracks is bypassed. All you need to practice is shut the Registry Editor, and restart your PC to allow the changes to have consequence earlier retrying the installation.
Featherbed the TPM two.0 and Secure Boot Requirements
This method involves using the Microsoft Media Creation Tool to build a bootable Win ten USB stick and accessing the Sources folder of the installation media in order to delete the install.esd or install.wim (whichever one is at that place).
Afterward you do this, you'll need to mount the Windows 11 ISO and re-create the install.wim file that y'all find inside before finally mounting the Win 10 again. This method volition permit you to install Windows 11 by tricking your system into believing that you're actually installing Windows x.
IMPORTANT: This method volition only piece of work if your current Bone partition is formatted to NTFS. FAT32 is express to file transfers of upwards to 4 GB, and then yous won't be able to copy over the install.esd file from the Windows 10 ISO. If yourself in this particular state of affairs and you're using FAT32, skip this method entirely and move down to the next method below.
If you're looking for specific instructions on how to do this, follow the instructions below:west
- You need to start by producing a bootable Windows 10 USB disk. To do this, y'all can either utilise the Media Creation Tool or you can use a third party tool similar RUFUS to brand a bootable Windows 10 stick.
- Once the Windows 10 USB disk is created and successfully mounted on the USB disk, open up the directory and delete the install.esd or install.wim (y'all'll merely find one of them inside).
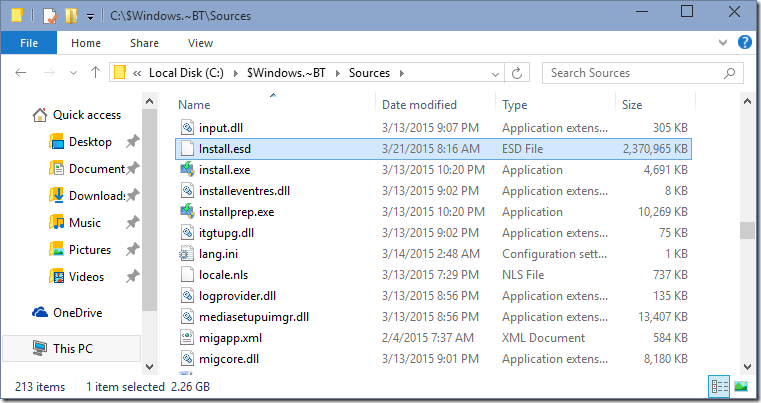
Deleting the install.esd or install.wim from the Sources folder - After the install file is removed from the Windows 10 installation disk, go alee and mount the Windows 11 ISO, get to the same Sources directory and copy the install.wim file to your clipboard.
- Return to the Windows 10 USB stick and paste the install.wim file that you previously copied from the Windows 11 ISO.
Note: When asked to ostend by the UAC (User Account Prompt), click Yes and wait until the operation is complete. - Finally, kick from the contradistinct Windows 10 USB stick and proceed with the installation to effectively install Windows eleven and featherbed the security requirements.
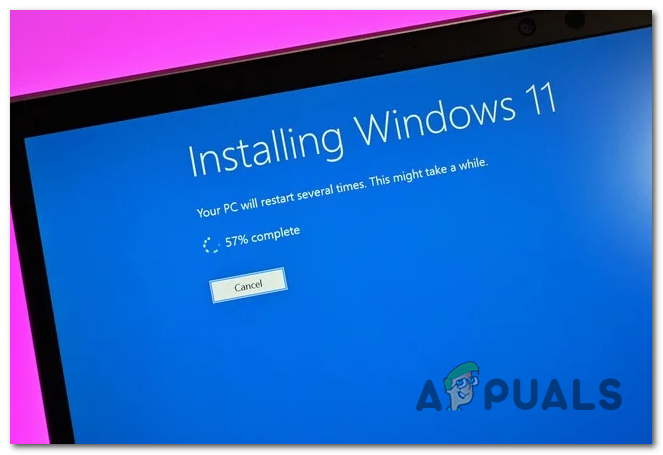
Installing Windows 11 If this method was non effective in your example or you're looking for a less intrusive approach, move down to the adjacent potential prepare below.
Convert WIM to ESD via PowerISO
If your OS bulldoze is formatted to FAT32, yous'll get a "File Prototype Is Too Large' error message when yous attempt to 'import' the 'install.wim file to Windows x ISO as shown in the method above. This happens considering FAT32 only supports files of up to 4GB in size which this detail install.wim file exceeds.
Notation: Y'all won't get this result if you're using NTFS which supports a maximum file size of 256 TB.
In case you find yourself in a scenario in which you're using FAT32, it's very inconvenient to change the file organization of your sectionalisation and reinstall the current Windows OS merely to take reward of this prepare.
A better style, in this case, is to use PowerISO to catechumen the 'install.wim' file to ESD which and paste that into the Windows 10 ISO. The file should exist now under 4 GB which will no longer trigger the "File Image Is Also Large' error".
Follow the steps below for instructions on how to bypass the Windows 11 Requirements by using PowerISO to catechumen the 'install.wim' file of Windows 11 to 'install.esd' and bypass the file system limitations:
- Open your default browser and download & install PoweISO from the official website. Once you're inside the right website, click on DownloadNow.

Downloading the latest user of PowerISO - On the side by side screen, download the same bit version equally your current OS.

Downloading the right PowerISO version - Once the installer is downloaded, double-click on it and click Yes at the User Account Command.
- Adjacent, plug the USB flash drive that you plan on using as installation media.
- Take the EULA by clicking on I concord at the showtime prompt, then follow the on-screen prompts to consummate the installation of the latest version of PowerISO.

Accepting the EULA of PowerISO - Once the installation is complete, open PowerISO with admin rights past correct-clicking on its icon and choosing Run as Administrator.
- Next, click on Continue Trial Version from the pop-up that only appeared.

Continue the Trial Version - From the main menu of PowerISO, click on Tools from the ribbon at the top, then click on Create Bootable USB Drive drive from the list of available options.

Create Bootable USB drive - Under Prototype file (under Select source), click on the binder icon and select the Windows x ISO.
Note: If yous don't have a viable Windows 10 ISO, either use the Media Creation Tool or y'all can use a third political party tool like RUFUS to brand a bootable Windows x stick. - Adjacent, select the flash drive that you programme on using equally the installation media using theDestination USB drivedrop-downwards menu.
- Finally, create the bootable USB drive by clicking on Start.

Create bootable USB drives - Confirm the performance, then wait until the procedure is complete.
- Once the bootable USB drive is successfully created, click on Tools from the ribbon bar once again, then click on WIM EST Converter from the list of available options.

Using the WIM EST converter - Next, from the newly appeared window, access the Convert WIM to ESDtab, so click on the folder icon associated with Select source prototype file and browse Windows xi ISO (make certain information technology's mounted). Get to Sources, select install.wim and click on Open.

Loading up the .WIM files - Once the file is succesfully loaded into the WIM ESD Converter, click on Convert, confirm the selection and wait until the operation is complete.

Convert the WIM file - Once the operation is complete, accept the converted WIM file (which is at present a ESD file) and supersede the install.esd file in the sources binder on your bootable flash drive that you created at step eight.
- Install Windows 11 using the bootable USB drive that yous've but created and you should accept no issues bypassing the requirements.
![]()

Source: https://appuals.com/bypass-windows-11-installation-requirements/
Posted by: piercehurse1967.blogspot.com
0 Response to "How To Install Windows 10 On New Build Pc"
Post a Comment